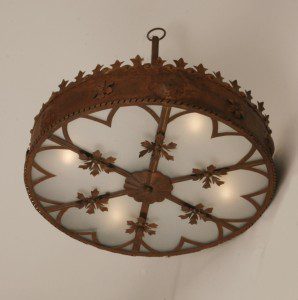
Whether you are hanging a new or replacement ceiling light fixture, you must have the right tools and know-how for the job. The main tools needed for successful installation are:
1. An assistant
2. Two ladders (one tall enough to reach the ceiling and the other for your assistant)
3. Two or three screwdrivers (one Phillips head)
4. Pliers
5. Small wire cutter
6. One utility knife
7. Electrical tape
8. Fasteners
9. Drill and bits
10. Wire nuts
11. Wire strippers
Safety first
Once you have the above tools ready, turn off the power at the circuit breaker that for that section of the building or home. Also turn the switch to the off position. Make sure the ladder is firmly planted on the floor. It is highly recommended that you use astep ladder.
Have your assistant there to help you when it comes time to actually hang the ceiling light fixture. This is especially important if the ceiling light fixture is large and bulky. This person will help hold the fixture as you attach the wires and lift it into place.
Installing the Ceiling Light
Since this is an electrical item, it is important to read and closely follow the instructions that come with the fixture. Before you can even begin the installation process, it is important to ensure that there is appropriate wiring for installing a ceiling light fixture. If there is, you will need to make sure that they are in order for a new installation.
Take all the parts of the fixture out of the container and arrange them in the order in which they will be used. The person assisting you should be able to pass the pieces to you as needed.
The Steps
1. First you will need to install the mounting bracket that came with the new fixture. If you have an old one already in place remove it.
2. Determine which wires are the neutral wires, both the one in the ceiling and the one on the light fixture. They are generally white. Use the wire strippers to remove approximately a half inch of the covering to expose the copper wires. Twist the exposed ends together, preferably in a clockwise position, and place the wire nut on. Tighten the wire nut by twisting in a clockwise direction. To ensure a tight connection, tug lightly on each wire separately.
3. Do the same thing with the black wires. These are the wires that conduct the electricity. Make sure that all wires are pushed into the electrical box and out of the way before proceeding.
4. Now that the wires are done, it is time to hang the new fixture. Get your assistant to hold the lighting fixture so that you can reach it safely when you are ready. You will need your assistant to hold the fixture for you while you are connecting it to the electrical wiring in the ceiling.
It is not impossible to do it by yourself, but this will call for you to the second step ladder. You will need it to place the light fixture on so that you can safely reach it when ready. However, this method is not ideal if the unit is large and you will find that having a second pair of hands minimizes the strain.
5. Finally screw in your bulbs and put the globe cover in place.
Before tidying up and firmly hanging the light fixture, do a trial run. Turn on the breaker and the light switch to ensure that everything works properly. Also check to see if there are any exposed wires that may cause problems later on. Remove the bulb you used for testing the fixture. Once the fixture is working properly, you can now firmly hang it by securely screwing it to the ceiling or the brackets provided. Remember to turn off power again before finalizing the project.
It is important to know that different types of light fixtures will require variations in installation. It is necessary to read the installation manual before beginning the installation process to ensure a job well done. This is true no matter how many installations you have done.
Adding chandliers is a great way to spruce up the look and feel of your home with one simple change. Know your limits though, if you do not feel comfortable with any portion of the project, be sure to hire a professional electrician.


